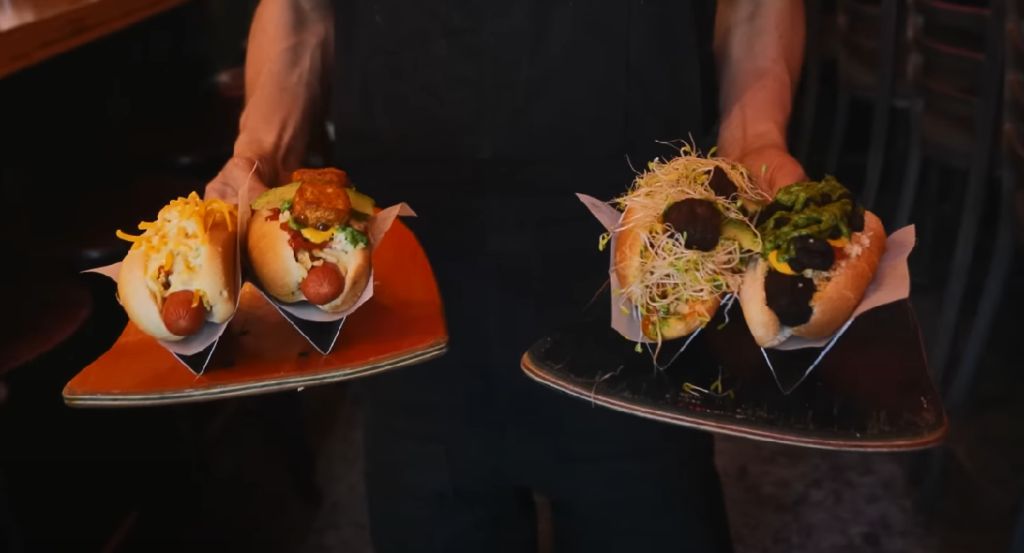
Must Try Before You Die!! USA TOP 10 Street Foods!!

New York City Hot Dog

USA top 10 Street foods is a mix of flavors that show the country’s diverse culture. It reflects the cooking influences from around the world. Here’s a list of the top 10 street foods in the USA that you must try before you die. These are the best from the best.

New York City Hot Dog No 1 in USA TOP 10 Street Foods
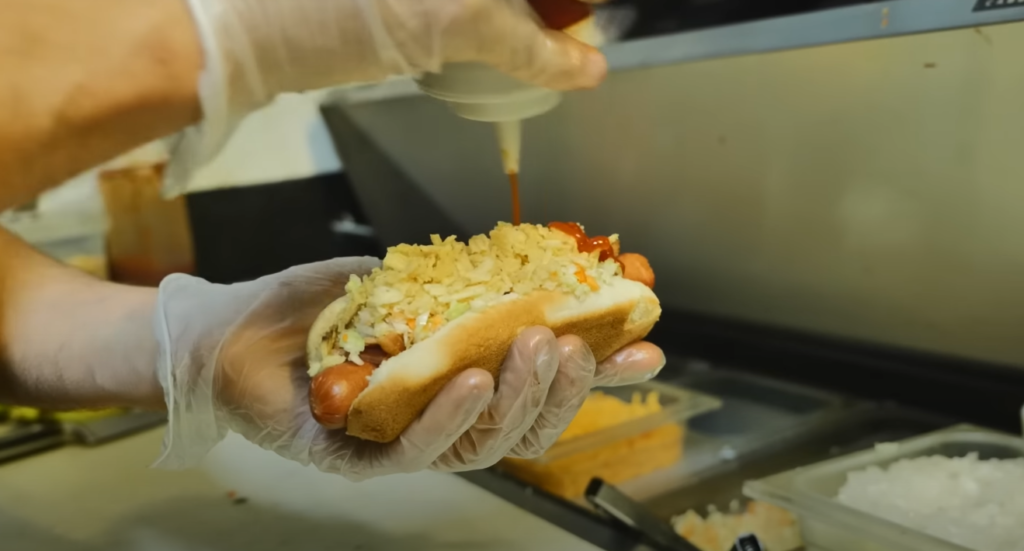
New York City Hot Dog No 1 in USA TOP 10 Street Foods
  • Description: The iconic NYC hot dog is a simple yet delightful and flavorful treat. It’s a steamed or grilled sausage in a soft bun, topped with mustard, ketchup, sauerkraut, onions, and relish.
  • Best Spot: Nathan’s Famous at Coney Island, or any hot dog cart around Central Park.
  • Why It’s the Best: The hot dog is a quintessential New York experience. It combines savory flavors with the bustling atmosphere of the city.

Simple New York City-Style Hot Dogs Recipe

Ingredients For HOT DOGS

For the Onion Sauce:

  • 2 teaspoons vegetable oil
  • 1 large onion, thinly sliced
  • ¼ cup water (60 mL)
  • 2 tablespoons ketchup
  • 1 teaspoon salt

For the Hot Dogs:

  • 4 Kosher beef hot dogs
  • 4 hot dog buns (preferably poppy seed)
  • Sauerkraut
  • Yellow mustard or spicy brown mustard

Instructions

Prepare the Onion Sauce:

  1. Heat Oil: In a skillet, heat the vegetable oil over low heat.
  2. Cook Onions: Add the sliced onions and cook for a few minutes until they start to soften.
  3. Add Ingredients: Stir in the water, ketchup, and salt. Cover the pan and cook for about 20 minutes, stirring occasionally, until the onions are soft and the sauce is thick.

Cook the Hot Dogs:

  1. Boil or Grill: Boil the hot dogs in water until hot, or grill them for about 5-7 minutes until they are evenly browned.
  2. Prepare Buns: Lightly steam the hot dog buns by placing them in a steamer basket over boiling water for about 1-2 minutes, or microwave them wrapped in a damp paper towel for about 10-15 seconds.

Assemble the Hot Dogs:

  1. Place Hot Dogs: Put each cooked hot dog into a steamed bun.
  2. Add Toppings: Top each hot dog with a generous amount of sauerkraut, followed by the onion sauce, and finish with mustard.
  3. Serve: Enjoy your New York-style hot dogs immediately while they are hot.

Nutritional Information (per serving)

  • Calories: 348
  • Fat: 23g
  • Carbohydrates: 21g
  • Protein: 12g

This easy recipe lets you enjoy the delicious taste of New York street food at home. Enjoy!

Chicago Deep-Dish Pizza No 2 in USA TOP 10 Street Foods

Chicago Deep-Dish Pizza No 2 in USA TOP 10 Street Foods
  • Description: Unlike traditional pizza, the deep-dish variant has a thick crust that rises up the sides of the pan. It’s filled with layers of cheese, meats, vegetables, and crushed tomatoes.
  • Best Spot: Lou Malnati’s or Giordano’s.
  • Why It’s the Best: This hearty pizza is a meal in itself. It offers a rich, cheesy, and indulgent experience that’s uniquely Chicago.

Chicago Deep-Dish Pizza Recipe

Experience the rich flavors of Chicago-style deep-dish pizza with this unique recipe. It highlights a buttery crust, hearty toppings, and a chunky tomato sauce.

Ingredients

For the Dough:

  • 3 ¼ cups all-purpose flour
  • ½ cup yellow cornmeal
  • 1 ½ teaspoons salt
  • 1 tablespoon sugar
  • 2 ¼ teaspoons instant yeast (1 packet)
  • 1 ¼ cups warm water (about 110°F)
  • ½ cup unsalted butter, melted

For the Sauce:

  • 1 tablespoon olive oil
  • 1 small onion, finely chopped
  • 3 cloves garlic, minced
  • 1 can (28 oz) crushed tomatoes
  • 1 teaspoon dried oregano
  • 1 teaspoon sugar
  • Salt and pepper to taste

For the Toppings:

  • 16 oz shredded mozzarella cheese
  • ½ cup grated Parmesan cheese
  • 1 lb Italian sausage (cooked and crumbled)
  • Optional: sliced bell peppers, mushrooms, or olives

Instructions

  1. Prepare the Dough: In a large bowl, combine flour, cornmeal, salt, sugar, and yeast. Gradually mix in warm water and melted butter until a dough forms. Knead for about 5 minutes until smooth. Let it rise in a warm place for 1 hour.
  2. Make the Sauce: Heat olive oil in a saucepan over medium heat. Sauté onions until translucent, then add garlic and cook for another minute. Stir in crushed tomatoes, oregano, sugar, salt, and pepper. Simmer for 20 minutes.
  3. Assemble the Pizza: Preheat your oven to 425°F (220°C). Grease a deep-dish pizza pan. Roll out the dough to fit the pan, leaving some overhang. Place the dough in the pan and layer with mozzarella cheese, cooked sausage, and sauce. Sprinkle Parmesan on top.
  4. Bake: Bake for 30-35 minutes until the crust is golden brown. Let it cool for 10 minutes before slicing.

Enjoy your homemade Chicago deep-dish pizza, packed with flavor and perfect for sharing!

San Francisco Mission Burrito No 3 in USA TOP 10 Street Foods

San Francisco Mission Burrito No 3 in USA TOP 10 Street Foods
  • Description: A massive burrito filled with rice, beans, cheese, sour cream, guacamole, meat (like carnitas, carne asada, or chicken), and wrapped in a soft flour tortilla.
  • Best Spot: Taqueria La Cumbre or El Farolito.
  • Why It’s the Best: The Mission burrito is a staple of San Francisco’s culinary scene. It’s known for its generous portions and vibrant flavors.

San Francisco Mission Burrito Recipe

Bring the vibrant flavors of San Francisco’s Mission District to your kitchen with this unique take on the beloved Mission burrito. Known for its hefty size and diverse fillings, this recipe allows you to customize your burrito to your liking.

Ingredients

For the Burrito:

  • 1 large flour tortilla (10-12 inches)
  • 1 cup Mexican-style rice (cooked)
  • 1 cup pinto or black beans (cooked)
  • 1 lb protein of choice (carnitas, grilled chicken, or tofu)
  • 1 avocado (sliced)
  • ½ cup salsa (your choice)
  • ½ cup shredded cheese (cheddar or Monterey Jack)
  • ¼ cup sour cream
  • Fresh cilantro (for garnish)
  • Lime wedges (for serving)

Optional Add-ins:

  • Sautéed bell peppers and onions
  • Jalapeños for heat
  • Corn for sweetness

Instructions

  1. Prepare the Rice: Cook the Mexican-style rice according to package instructions. For extra flavor, add lime juice and chopped cilantro once cooked.
  2. Cook the Protein: If using meat, season and cook your protein until fully cooked. For carnitas, slow-cook pork with spices until tender. For tofu, marinate and grill or sauté until golden.
  3. Warm the Tortilla: Heat the flour tortilla on a skillet for about 30 seconds on each side to make it pliable.
  4. Assemble the Burrito: Lay the warm tortilla flat. In the center, layer the rice, beans, protein, avocado slices, salsa, cheese, and sour cream. Add any optional toppings you desire.
  5. Roll It Up: Fold the sides of the tortilla inward, then roll it tightly from the bottom up, ensuring all fillings are enclosed.
  6. Toast (Optional): For a crispy exterior, place the rolled burrito seam-side down on a hot skillet for a few minutes until golden brown.
  7. Serve: Cut the burrito in half and serve with lime wedges and extra salsa on the side.

Enjoy your homemade San Francisco Mission burrito, packed with flavors and textures that celebrate this iconic dish!

Los Angeles Food Truck Tacos no 4 in USA TOP 10 Street Foods

Los Angeles Food Truck Tacos no 4 in USA TOP 10 Street Foods
  • Description: Authentic Mexican tacos featuring soft corn tortillas filled with marinated meats, onions, cilantro, and a squeeze of lime.
  • Best Spot: El Chato Taco Truck or any truck on Tacos El Güero.
  • Why It’s the Best: LA’s street tacos are renowned for their authenticity and flavor. They reflect the city’s rich Hispanic heritage.

To recreate the vibrant flavors of Los Angeles food truck tacos in your kitchen, you can whip up a delicious batch of carne asada tacos. These tacos are known for their simplicity and robust taste, making them a favorite among taco lovers. Here’s a unique take on the classic recipe that captures the essence of street tacos.

Ingredients

  • For the Carne Asada:
    • 1.5 pounds of flank steak or skirt steak
    • 1/4 cup soy sauce
    • 1/4 cup freshly squeezed lime juice
    • 2 tablespoons olive oil
    • 3 cloves garlic, minced
    • 1 teaspoon ground cumin
    • 1 teaspoon smoked paprika
    • 1 teaspoon chili powder
    • Salt and pepper to taste
  • For the Tacos:
    • 12 small corn tortillas
    • 1 small onion, finely chopped
    • 1/2 cup fresh cilantro, chopped
    • Lime wedges for serving
    • Salsa of your choice (red or green)

Instructions

1. Marinate the Meat:In a bowl, combine the soy sauce, lime juice, olive oil, minced garlic, cumin, smoked paprika, chili powder, salt, and pepper.Place the steak in a resealable bag or a shallow dish and pour the marinade over it. Seal the bag or cover the dish and let it marinate in the refrigerator for at least 1 hour, or up to overnight for maximum flavor.

2. Cook the Steak:Heat a grill or a cast-iron skillet over high heat. Remove the steak from the marinade, allowing excess marinade to drip off.Grill the steak for about 4-5 minutes on each side, or until it reaches your desired level of doneness. For a perfect medium-rare, aim for an internal temperature of 130°F (54°C).Once cooked, transfer the steak to a cutting board and let it rest for a few minutes. This allows the juices to redistribute, ensuring a juicy bite.

3. Prepare the Tortillas:While the steak is resting, warm the corn tortillas. You can do this by placing them directly on the grill for a few seconds on each side or heating them in a dry skillet over medium heat until they become pliable.

4. Assemble the Tacos:Slice the rested steak against the grain into thin strips.To assemble, take a warm tortilla and add a generous portion of the sliced carne asada. Top with chopped onion and cilantro.Finish with a squeeze of fresh lime juice and a spoonful of your favorite salsa.

5. Serve:Enjoy your tacos immediately, preferably while standing by the grill or at the kitchen counter, just like you would from a taco truck in Los Angeles. Pair with cold Mexican soda or a refreshing agua fresca to complete the experience.

Tips for Authenticity

  • Double Tortillas: Street tacos often use two tortillas to hold the filling better and prevent tearing. This also adds a delightful texture.
  • Salsa Variety: Offer a selection of salsas, such as a smoky tomatillo salsa or a spicy red salsa, to cater to different taste preferences.
  • Chop the Meat: For a more authentic touch, chop the cooked steak into smaller pieces before adding it to the tortillas. This mimics the way many taco trucks serve their carne asada.

By following this recipe, you can bring the essence of Los Angeles taco trucks right into your home, allowing you to savor the flavors of street-style tacos anytime you desire. Enjoy!

New Orleans Beignets No 5 in USA TOP 10 Street Foods

New Orleans Beignets No 5 in USA TOP 10 Street Foods
  • Description: Light, airy, and deep-fried dough squares, generously dusted with powdered sugar.
  • Best Spot: Café du Monde.
  • Why It’s the Best: Beignets are a sweet taste of New Orleans’ French influence. They’re perfect with a cup of chicory coffee.

To bring a taste of New Orleans into your home, making beignets is a delightful way to indulge in this iconic treat. These fluffy, square pastries, generously dusted with powdered sugar, are perfect for breakfast, dessert, or a sweet snack. Here’s a unique recipe that captures the essence of this beloved delicacy.

Ingredients

  • For the Dough:
    • 1 cup warm water (about 110°F)
    • 2 teaspoons active dry yeast
    • 1/3 cup granulated sugar, plus 1 tablespoon
    • 2/3 cup whole milk
    • 1 large egg
    • 3 tablespoons unsalted butter, melted
    • 1 teaspoon vanilla extract
    • 3 ¾ to 4 cups all-purpose flour
    • 1/2 teaspoon salt
  • For Frying:
    • Vegetable oil (enough for deep frying)
  • For Dusting:
    • Confectioners’ sugar

Instructions

1. Activate the Yeast:In a mixing bowl, combine the warm water, 1 tablespoon of sugar, and yeast. Allow it to sit for about 10 minutes until it becomes frothy, indicating that the yeast is active.

2. Prepare the Dough:Once the yeast is ready, add the remaining sugar, milk, egg, melted butter, and vanilla extract to the mixture. Stir until well combined.Gradually add in 3 ¾ cups of flour and salt, mixing until a sticky dough forms. If the dough is too sticky, incorporate additional flour, a tablespoon at a time, until it pulls away from the sides of the bowl.

3. Let It Rise:Cover the bowl with plastic wrap or a clean kitchen towel and let the dough rise in a warm area for about 1 to 2 hours, or until it has doubled in size.

4. Shape the Beignets:Once the dough has risen, turn it out onto a floured surface. Roll it out to about ½ inch thick. Cut the dough into squares or rectangles, roughly 2 inches wide.

5. Heat the Oil:In a deep pot or Dutch oven, heat vegetable oil to 350°F. Use a thermometer to maintain the temperature for even frying.

6. Fry the Beignets:Carefully drop a few pieces of dough into the hot oil, being cautious not to overcrowd the pot. Fry for about 1.5 to 2 minutes on each side, or until they are golden brown. Use a slotted spoon to remove them and let them drain on paper towels.

7. Dust with Sugar:While still warm, generously dust the beignets with confectioners’ sugar. For an extra touch, you can shake them in a paper bag filled with sugar for an even coating.

Serving Suggestions

Serve your beignets warm alongside a cup of café au lait or your favorite coffee. They can also be enjoyed with a side of fruit preserves or chocolate sauce for dipping, adding a delightful twist to the classic experience.

Tips for Perfect Beignets

  • Dough Consistency: The dough should be soft and slightly sticky; avoid adding too much flour, which can make the beignets dense.
  • Frying Temperature: Maintaining the oil temperature is crucial. If the oil is too cool, the beignets will absorb excess oil; if too hot, they will brown too quickly without cooking through.
  • Storage: For the best taste, enjoy beignets fresh. However, if you have leftovers, store them in an airtight container at room temperature for up to three days. Reheat briefly in the microwave for a few seconds before serving.

By following this recipe, you can create your own batch of New Orleans beignets that rival those found in the famous cafés of the city. Enjoy the sweet, fluffy goodness that is sure to transport you to the vibrant streets of New Orleans with every bite!

Philadelphia Cheesesteak No 6 in USA TOP 10 Street Foods

Philadelphia Cheesesteak No 6 in USA TOP 10 Street Foods
  • Description: A sandwich made from thinly sliced beefsteak and melted cheese in a long hoagie roll. It’s often topped with onions, mushrooms, and bell peppers.
  • Best Spot: Pat’s King of Steaks or Geno’s Steaks.
  • Why It’s the Best: The Philly cheesesteak is a hearty, flavorful, and satisfying meal. It’s emblematic of Philadelphia’s culinary landscape.

To create a delicious Philadelphia cheesesteak at home, follow this unique recipe that captures the essence of this iconic sandwich while adding a personal twist. Known for its tender beef, melted cheese, and flavorful toppings, the cheesesteak is a true American classic.

Ingredients

  • For the Steak:
    • 1 pound ribeye or sirloin steak, thinly sliced
    • 1 tablespoon olive oil
    • Salt and black pepper to taste
  • For the Vegetables:
    • 1 large onion, thinly sliced
    • 1 bell pepper (green or red), thinly sliced
    • 2 cloves garlic, minced
    • 1 tablespoon Worcestershire sauce
  • For Assembly:
    • 4 hoagie rolls or sub rolls
    • 8 slices provolone cheese (or your choice of cheese)
    • Optional: hot cherry peppers for added heat

Instructions

1. Prepare the Steak:To ensure easy slicing, place the steak in the freezer for about 30 minutes before cutting. This firms it up, making it easier to achieve those ultra-thin slices.Once sliced, season the beef with salt and pepper.

2. Sauté the Vegetables:In a large skillet, heat the olive oil over medium heat. Add the sliced onions and bell peppers, cooking until they soften and become slightly caramelized, about 5-7 minutes.Stir in the minced garlic and Worcestershire sauce, cooking for an additional minute until fragrant. Remove the vegetables from the skillet and set aside.

3. Cook the Steak:In the same skillet, increase the heat to high. Add the seasoned steak in a single layer. Allow it to sear for about 2-3 minutes without stirring to develop a nice crust, then flip and cook for another 2 minutes until browned and cooked through.

4. Combine Ingredients:Return the sautéed onions and peppers to the skillet with the steak. Mix everything together, allowing the flavors to meld for another minute.

5. Melt the Cheese:Lay the provolone cheese slices over the steak and vegetable mixture. Cover the skillet with a lid to help the cheese melt evenly for about 1-2 minutes.

6. Assemble the Sandwiches:While the cheese is melting, slice the hoagie rolls open. If desired, lightly toast the insides on a griddle or in a toaster oven.Spoon the cheesy steak and vegetable mixture generously into each roll. If you like a bit of heat, add sliced hot cherry peppers on top.

Enjoy!

Serve your homemade Philadelphia cheesesteaks hot, ideally with a side of crispy fries or a fresh salad. This easy-to-make sandwich brings the flavors of Philadelphia right to your kitchen, making it perfect for a hearty lunch or dinner. Enjoy the gooey, savory goodness that makes cheesesteaks a beloved classic!

Seattle Teriyaki No 7 in USA TOP 10 Street Foods

Seattle Teriyaki No 7 in USA TOP 10 Street Foods
  • Description: Grilled chicken or beef marinated in a sweet and savory teriyaki sauce, served over rice with a side of vegetables.
  • Best Spot: Toshi’s Teriyaki or any of Seattle’s numerous teriyaki joints.
  • Why It’s the Best: Seattle’s teriyaki is a unique fusion of Japanese and American flavors. It’s known for its tender meat and delicious sauce.

Seattle-Style Teriyaki Chicken: A Flavor Explosion in Every Bite

Seattle has a unique and delicious take on teriyaki chicken that sets it apart from the rest. This recipe captures the essence of the Pacific Northwest’s favorite dish, with a few personal twists to make it extra special.

Ingredients

  • For the Chicken:
    • 2 lbs boneless, skin-on chicken thighs
    • 1 tbsp olive oil
    • Salt and pepper to taste
  • For the Teriyaki Sauce:
    • 1 cup soy sauce
    • 1/2 cup brown sugar
    • 1/4 cup mirin
    • 2 tbsp rice vinegar
    • 1/4 cup water
    • 3 cloves garlic, minced
    • 1 tbsp grated fresh ginger
    • 1 tsp toasted sesame oil
    • 1 tbsp cornstarch
  • For Serving:
    • Cooked jasmine rice
    • Shredded cabbage
    • Sliced green onions
    • Toasted sesame seeds

Instructions

  1. Marinate the Chicken: In a large bowl or resealable bag, combine the chicken thighs with 1/2 cup of the teriyaki sauce (see below for sauce instructions). Cover and refrigerate for at least 2 hours, or up to overnight.
  2. Make the Teriyaki Sauce: In a small saucepan, whisk together the soy sauce, brown sugar, mirin, rice vinegar, water, garlic, and ginger. Bring to a boil over medium heat, stirring occasionally until the sugar dissolves. Remove from heat and stir in the sesame oil.
  3. Thicken the Sauce: In a small bowl, whisk together the cornstarch and 2 tbsp water to make a slurry. Pour the slurry into the teriyaki sauce and return to medium heat. Bring to a simmer, stirring constantly, until the sauce thickens to a syrupy consistency, about 2-3 minutes. Remove from heat and set aside.
  4. Grill the Chicken: Preheat a grill or grill pan to medium-high heat. Remove the chicken from the marinade and discard any remaining marinade. Grill the chicken for 5-7 minutes per side, or until cooked through and slightly charred. Brush the chicken with the reserved teriyaki sauce during the last minute of cooking.
  5. Broil for Caramelization: Transfer the grilled chicken to a foil-lined baking sheet. Broil for 2-3 minutes per side, or until the sauce caramelizes and creates a sticky glaze on the chicken.
  6. Slice and Serve: Let the chicken rest for 5 minutes, then slice into 1/2-inch strips. Serve over steamed jasmine rice, topped with shredded cabbage, sliced green onions, and toasted sesame seeds. Drizzle with any remaining teriyaki sauce.

Tips for Authentic Seattle-Style Teriyaki

  • Use skin-on chicken thighs for maximum flavor and juiciness.
  • Marinate the chicken for at least 2 hours, or up to overnight, for the best flavor penetration.
  • Grate the ginger using a microplane for a smooth, evenly distributed flavor in the sauce.
  • Broil the chicken for a few minutes after grilling to create a signature sticky, caramelized glaze.
  • Serve with a side of shredded cabbage and jasmine rice for a complete Seattle-style teriyaki experience.

By following this recipe and incorporating these tips, you’ll be able to recreate the iconic flavors of Seattle teriyaki right in your own kitchen. Get ready for a taste sensation that will transport you straight to the Pacific Northwest!

Austin BBQ Brisket No 8 in USA TOP 10 Street Foods

Austin BBQ Brisket No 8 in USA TOP 10 Street Foods
  • Description: Slow-smoked beef brisket, seasoned with a simple rub of salt and pepper, resulting in tender, flavorful meat with a perfect bark.
  • Best Spot: Franklin Barbecue.
  • Why It’s the Best: Austin’s BBQ brisket is legendary for its smoky flavor and melt-in-your-mouth texture, making it a must-try for meat lovers.

To create an authentic Austin-style BBQ brisket at home, follow this unique recipe that captures the essence of Texas barbecue. Known for its smoky flavor, tender texture, and delicious bark, this brisket will impress your family and friends.

Ingredients

  • For the Brisket:
    • 1 whole packer brisket (10-12 pounds), trimmed
    • 1 tablespoon kosher salt
    • 1 tablespoon freshly ground black pepper
    • 1 tablespoon garlic powder
    • 1 tablespoon onion powder
    • 1 tablespoon smoked paprika (optional, for added depth)
  • For Smoking:
    • 2-3 chunks of oak or hickory wood for smoking
    • Water pan (optional, to maintain moisture)

Instructions

1. Prepare the Brisket:Start by trimming the brisket. Leave about 1/4 inch of fat on the top to keep the meat moist during cooking. This fat cap will render down and add flavor.In a small bowl, mix together the kosher salt, black pepper, garlic powder, onion powder, and smoked paprika. Generously rub this spice mixture all over the brisket, ensuring even coverage on both sides. Wrap the brisket in plastic wrap and refrigerate for at least 8 hours, preferably overnight. This allows the flavors to penetrate the meat.

2. Preheat the Smoker:Set your smoker to 225°F (107°C). If using a charcoal smoker, arrange the coals on one side and place a water pan on the other to help maintain moisture. For electric or pellet smokers, simply set the temperature and add wood chunks as needed.

3. Smoke the Brisket:Once the smoker is ready, place the brisket fat-side up on the grill grate. Insert a meat thermometer into the thickest part of the brisket to monitor the internal temperature.Smoke the brisket for approximately 1 to 1.5 hours per pound, aiming for an internal temperature of around 195°F to 205°F (90°C to 96°C). This range is where the collagen breaks down, resulting in tender, juicy meat.

4. The Texas Crutch (Optional):After about 5-6 hours of smoking, when the brisket reaches an internal temperature of around 160°F (71°C), you can wrap it in butcher paper or aluminum foil. This technique, known as the Texas Crutch, helps retain moisture and speeds up the cooking process. If you prefer a thicker bark, you can skip this step and continue smoking without wrapping.

5. Resting the Brisket:Once the brisket reaches your desired internal temperature, remove it from the smoker and let it rest for at least 30 minutes, wrapped in a towel or butcher paper. This resting period allows the juices to redistribute throughout the meat, ensuring every bite is flavorful and moist.

6. Slice and Serve:After resting, slice the brisket against the grain into 1/4-inch thick slices. Serve it on butcher paper or a platter, accompanied by classic sides like coleslaw, baked beans, or potato salad.

Tips for Success

  • Wood Choice: Oak is a classic choice for Texas brisket, providing a mild flavor. Hickory adds a stronger smoke flavor, so you can mix the two for a balanced taste.
  • Temperature Control: Maintaining a consistent temperature is key to achieving the perfect brisket. Invest in a good digital meat thermometer to monitor both the smoker and meat temperatures.
  • Practice Patience: Smoking brisket is a labor of love. Allow plenty of time for cooking and resting to achieve that tender, melt-in-your-mouth texture.

By following this recipe, you can recreate the mouthwatering experience of Austin BBQ brisket right in your own backyard. Enjoy the smoky, savory goodness that defines Texas barbecue!

Miami Cuban Sandwich No 9 in USA TOP 10 Street Foods

Miami Cuban Sandwich No 9 in USA TOP 10 Street Foods
  • Description: A pressed sandwich with roasted pork, ham, Swiss cheese, pickles, and mustard on Cuban bread.
  • Best Spot: Versailles Restaurant.
  • Why It’s the Best: The Cuban sandwich is a delicious testament to Miami’s Cuban community, offering a perfect balance of flavors and textures.

To enjoy a taste of Miami, making a Cuban sandwich at home is a delightful culinary adventure. This recipe highlights the essential flavors and textures that make the Cuban sandwich a beloved classic.

Ingredients

  • For the Sandwich:
    • 1 loaf of Cuban bread (or a soft Italian baguette if unavailable)
    • 1/2 pound mojo-marinated pork, thinly sliced or shredded
    • 1/2 pound sweet ham, sliced
    • 4 slices Swiss cheese
    • Yellow mustard, to taste
    • Dill pickles, sliced (avoid sweet pickles)
  • For the Mojo Marinade (for the pork):
    • 3-4 pounds pork shoulder
    • 1/3 cup fresh sour orange juice (or a mix of 1/4 cup orange juice and the juice of 1 lemon)
    • 4 cloves garlic, minced
    • 1 teaspoon kosher salt
    • 1/2 teaspoon black pepper

Instructions

1. Prepare the Mojo Pork

Start by marinating the pork shoulder. In a bowl, combine the sour orange juice, minced garlic, salt, and pepper. Place the pork in a slow cooker or a large resealable bag, pour the marinade over it, and let it marinate in the refrigerator for at least 4 hours, preferably overnight.When ready to cook, place the marinated pork in a slow cooker and cook on low for 8 hours or until it’s tender and easily shredded. Alternatively, you can roast it in the oven at 300°F (150°C) for about 4-5 hours.

2. Assemble the Sandwich

Once the pork is cooked and shredded, it’s time to assemble your Cuban sandwich. Cut the Cuban bread in half lengthwise. Spread a generous layer of yellow mustard on both sides of the bread.Layer the bottom half with the shredded mojo pork, followed by the sweet ham, Swiss cheese, and slices of dill pickles.

3. Grill the Sandwich

Preheat a panini press or a large skillet over medium heat. If using a skillet, you can place a heavy cast-iron skillet on top of the sandwich to press it down.Spread a thin layer of butter on the outside of the sandwich. Place the sandwich in the press or skillet and cook for about 5-7 minutes, or until the bread is golden brown and the cheese has melted. If using a skillet, flip the sandwich halfway through cooking to ensure even browning.

4. Serve

Once the sandwich is perfectly toasted, remove it from the heat and let it rest for a minute. Slice it diagonally and serve hot, ideally with a side of plantain chips or a refreshing salad.

Tips for the Perfect Cuban Sandwich

  • Bread Choice: Authentic Cuban bread is ideal, but if you can’t find it, a soft Italian baguette works well due to its similar texture.
  • Mojo Marinade: The key to a flavorful Cuban sandwich is the mojo pork. If sour oranges are hard to find, the orange and lemon juice mix is a great substitute.
  • Pressing the Sandwich: If you don’t have a panini press, use a heavy skillet or a baking sheet with weights to press the sandwich down while it cooks.

By following this recipe, you’ll create a delicious Miami-style Cuban sandwich that captures the vibrant flavors of this iconic dish. Enjoy the layers of savory pork, ham, and cheese, all brought together in a perfectly toasted sandwich!

Portland Voodoo Doughnut No 10 in USA TOP 10 Street Foods

Portland Voodoo Doughnut street food
  • Description: Creative and quirky doughnuts with unique toppings and fillings, such as the Bacon Maple Bar or the Voodoo Doll.
  • Best Spot: Voodoo Doughnut.
  • Why It’s the Best: Voodoo Doughnut is famous for its inventive and fun approach to doughnuts, providing a delightful treat for the senses.

To bring the iconic flavors of Portland’s Voodoo Doughnut into your kitchen, try your hand at creating a unique version of their famous Bacon Maple Bar. This decadent doughnut combines the irresistible duo of salty bacon and sweet maple for a truly indulgent treat.

Ingredients

  • For the Doughnuts:
    • 1 package active dry yeast
    • 1/4 cup warm water (110°F)
    • 3/4 cup whole milk, heated to 110-115°F
    • 1/4 cup granulated sugar
    • 1 large egg, at room temperature
    • 1/4 cup bacon grease, melted and cooled
    • 2 cups bread flour
    • 1 cup all-purpose flour, plus more for dusting
    • 1/2 teaspoon freshly grated nutmeg
    • 1/2 teaspoon salt
    • Vegetable oil for frying
  • For the Maple Glaze:
    • 2 cups confectioners’ sugar
    • 1/3 cup pure maple syrup
    • 1 tablespoon light corn syrup
    • 1/2 teaspoon vanilla extract
    • 2 tablespoons reserved bacon grease
  • For the Bacon Topping:
    • 10 slices bacon, cooked until crisp
    • 2 tablespoons dark brown sugar

Instructions

  1. Activate the Yeast: In a small bowl, combine the yeast and warm water. Let sit for 5 minutes until frothy.
  2. Make the Dough: In a large bowl, whisk together the warm milk, sugar, egg, and melted bacon grease. Add the yeast mixture and stir to combine.
  3. Knead the Dough: In a stand mixer fitted with the dough hook, gradually add the bread flour, all-purpose flour, nutmeg, and salt. Knead on medium speed for 2 minutes, then increase to high speed and knead for an additional 3-4 minutes until a soft, smooth dough forms.
  4. Let the Dough Rise: Grease a large bowl with butter or oil. Place the dough in the bowl, turning to coat all sides. Cover with plastic wrap and let rise for 1-2 hours until doubled in size.
  5. Prepare the Bacon: Preheat oven to 375°F. Line a baking sheet with foil and place a wire rack on top. Toss the bacon with the brown sugar and arrange on the rack. Bake for 15-20 minutes until crisp. Let cool, then chop into small pieces.
  6. Make the Glaze: In a medium bowl, whisk together the confectioners’ sugar, maple syrup, corn syrup, vanilla, and 2 tablespoons of the reserved bacon grease until smooth. Cover with plastic wrap to prevent hardening.
  7. Fry the Doughnuts: Line a baking sheet with parchment paper. Roll the dough to 1/2-inch thickness on a floured surface. Cut into doughnut shapes using a doughnut cutter or biscuit cutter. Reroll scraps once.
  8. Fry the doughnuts in batches in 365°F oil for 1 minute per side until golden brown. Drain on a paper towel-lined rack.
  9. Assemble: Dip the warm doughnuts into the maple glaze, allowing excess to drip off. Top with chopped bacon pieces.
  10. Enjoy: Serve the Bacon Maple Bars warm, with the bacon adding a delightful crunch to the sweet, maple-glazed doughnut.

Tips for Voodoo Doughnut Flair

  • Use a digital candy thermometer to maintain the perfect frying temperature for light, fluffy doughnuts.
  • Sprinkle the bacon on the glazed doughnuts immediately for the best adhesion.
  • For an extra special touch, drizzle the doughnuts with a bit of extra maple syrup before serving.

By following this recipe and adding your own unique spin, you can recreate the magic of Voodoo Doughnut right at home. Indulge in the perfect balance of salty bacon and sweet maple for a doughnut experience that will transport you straight to Portland.

Leave a Comment

Your email address will not be published. Required fields are marked *

Scroll to Top